Installing Rulex Platform#
Rulex Platform software is delivered in two different architectural versions: a standalone installation or a cloud/server deployment.
The standalone version is installed on computers or virtual machines and provides an easy entry point for all the people who want to play with their data and start immediately to get value from our software.
The cloud/server version, on the other hand, is the typical installation in enterprise environments where scaling and reducing computational hardware costs are of the utmost importance. Rulex Platform supports all most important cloud/server providers (Azure, Google, Red Hat Openshift, AWS…).
Prerequisites#
Rulex Platform’s installation process is very easy and intuitive.
The software will quickly be up and running on your machine.
Note
Windows OS and Ubuntu are currently supported.
To start using Rulex Platform standalone version and to install it on your machine, you need to satisfy the following prerequisites:
Rulex Platform Installer: the installer is the executable that will guide you through the installation phase, providing all the files required to run Rulex Platform. The installer file format will be
.exefor Windows,.debfor Ubuntu.- Product Key: the Product Key is a code, which is provided along with the installer, identifying all the features of the purchased license. It is a combination of alphanumerical characters that contains:
The services purchased and the limitations you have on their use (e.g. the tasks included in your package);
The number of users that can use the services simultaneously;
The maximum number of sessions that can be run at the same time.
To receive the Product Key, you can contact your Rulex Point of Contact or you can fill in the form linked here to receive a 30-days free trial.
In order to use Rulex Platform in the best way possible, the machine you are using must comply with certain requirements (all the values listed below should be considered as recommended):
Prereq. |
|---|
Runtime prerequisite |
CPU |
RAM, according to the following licenses: Lite, Personal, Enterprise. |
Hard Disk Space |
IOPS |
Network |
Additional tools |
Lite |
Personal |
Enterprise |
|---|---|---|
Microsoft Windows 10 (64 bit) - 1909 or higher |
Microsoft Windows 10 (64 bit) - 1909 or higher |
Microsoft Windows 10 (64 bit) - 1909 or higher |
CPU with x86_64 architecture |
4 cores recommended, 8 cores optimum. |
4 cores recommended, 8 cores optimum. |
4 GB (minimum) – 8 GB (recommended) |
16 GB (minimum) – 32 GB (recommended) |
The following RAM prerequisites are based on an average number of cells to process: |
50 GB (minimum) – 200 GB (recommended) |
200 GB (minimum) – 500 GB (recommended) |
1 TB minimum, 2 TB recommended, although the exact amount of space depends on the volume of processed data. |
1000 recommended, 2000 optimum. |
1000 recommended, 2000 optimum. |
1000 recommended, 2000 optimum. |
|
|
|
Microsoft C++ Redistributable, which can be downloaded from here. The link is also provided during the installation process in the standard installation. |
Microsoft C++ Redistributable, which can be downloaded from here. The link is also provided during the installation process in the standard installation. |
Microsoft C++ Redistributable, which can be downloaded from here. The link is also provided during the installation process in the standard installation. |
Lite |
Personal |
Enterprise |
|
|---|---|---|---|
Runtime |
Ubuntu 22.04 LTS (Jammy Jellyfish) |
Ubuntu 22.04 LTS (Jammy Jellyfish) |
Ubuntu 22.04 LTS (Jammy Jellyfish) |
CPU |
CPU with x86_64 architecture |
4 cores recommended, 8 cores optimum. |
4 cores recommended, 8 cores optimum. |
RAM |
4 GB (minimum) – 8 GB (recommended) |
16 GB (minimum) – 32 GB (recommended) |
The following RAM prerequisites are based on an average number of cells to process: |
Hard Disk Space |
50 GB (minimum) – 200 GB (recommended) |
200 GB (minimum) – 500 GB (recommended) |
1TB minimum, 2TB recommended, although the exact amount of space depends on the volume of processed data. |
IOPS |
1000 recommended, 2000 optimum. |
1000 recommended, 2000 optimum. |
1000 recommended, 2000 optimum. |
Standalone wizard installation#
To install Rulex Platform, follow the steps below:
Locate the folder where you saved the Rulex Platform installer on your personal computer.
Double-click the installer file to launch the installation.
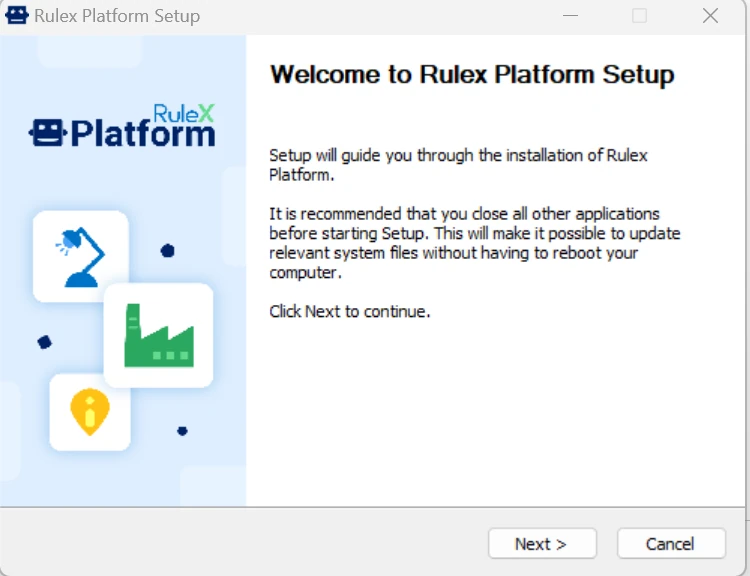
Click Next in the welcome screen to get started.
Click I Agree in the Terms and Conditions window.
If you do not accept the terms and conditions, Rulex Platform will not be installed.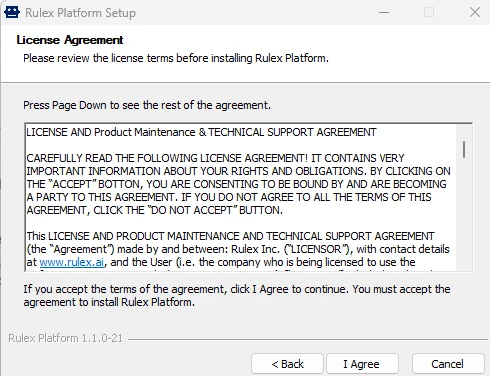
Insert your product key.
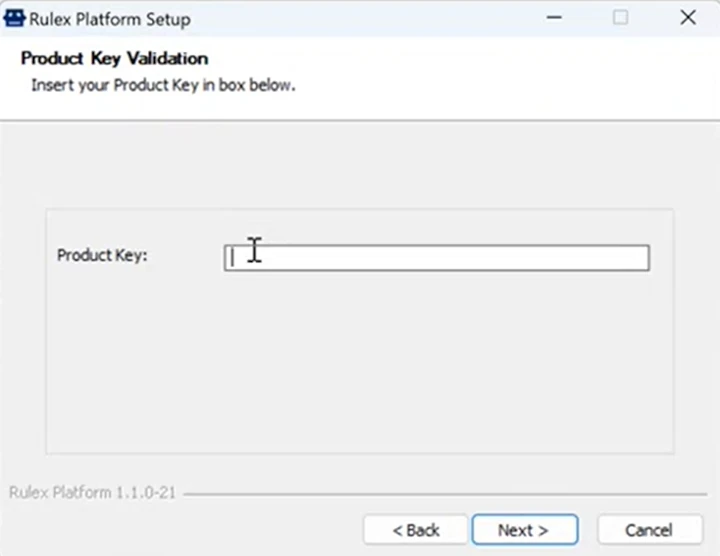
Wait until the Valid product key message appears, then click OK.
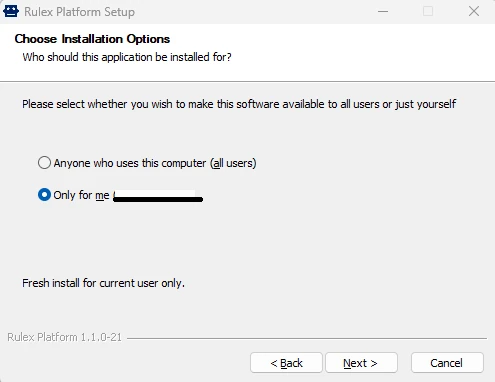
Select the required installation option:
Anyone who uses this computer (all users) - to allow all computer users to use Rulex.
This option is called a machine wide installation and is available only to the system administrator of the machine.
Only for me (username) - to allow only the current user (i.e. yourself) to use this installation of Rulex.
Click Next to install Rulex in the proposed default location, otherwise click Browse to navigate to a different folder.
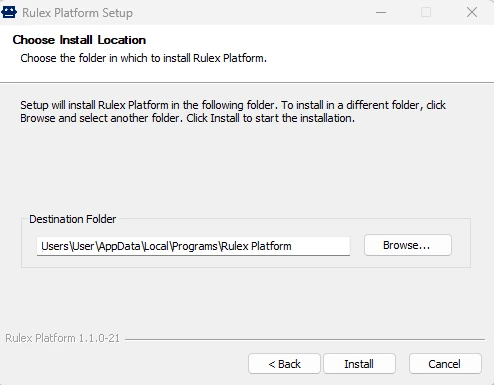
Click Install.
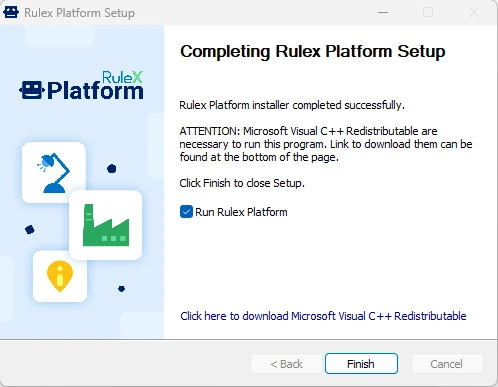
Select the Run Rulex Platform checkbox if you want Rulex Platform to open automatically at the end of the installation process.
Click Finish to end the installation process.
The installation on Ubuntu must be performed as follows:
In the Ubuntu terminal, type the following command:
sudo dpkg -i your_installer_name.deb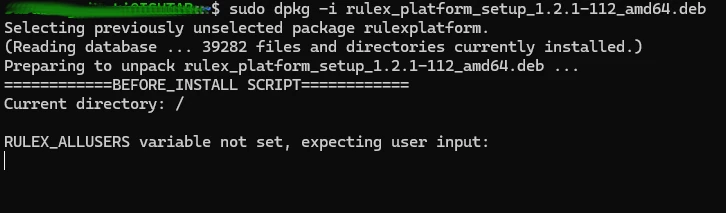
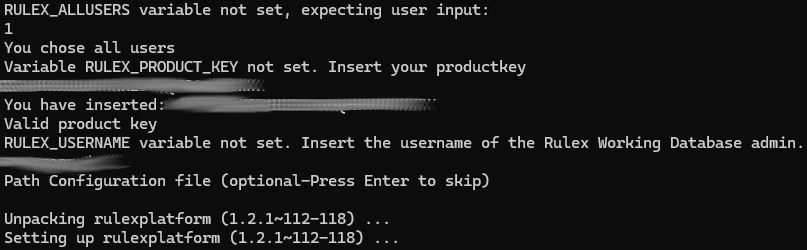
Define the installation option by typing either 0 or 1:
0 means the installation will be performed on the current user, so the installer will be stored in the path
/home/username/opt/rulexplatform.1 means the installation will be performed machine-wide, so all users within the machine will have Rulex Platform installed, so the installer will be stored in the path
/opt/rulexplatform.
Insert the Product Key in the required field.
Type the username. This username is going to become admin of the new installation.
Specify the configuration file path. This field is not mandatory, so it can be left empty by pressing Enter on the keyboard.
If any dependency is missing, type
sudo apt --fix-broken installto install any missing dependency.To run Rulex Platform, type
./rulexplatformif you are already in the folder where the installer is stored, while type/path/to/rulexplatformif it is stored in a folder different from the one you are working on.
Standalone silent installation#
In some occurrences you need to install Rulex Platform standalone silently through an automatic script.
&".\rulex_platform_installer_x.x.x-x.exe" /S /allusers /PK="xxxxx-xxxxx-xxxxx-xxxxx-xxxxx"
Where the optional listed arguments perform the following:
/S launches an installer in silent mode
/allusers launches an installer for all users
/PK=”myproductkey” passes a product key to a silent installer
If the operation is successful, the command returns 0, while if it fails, it returns an error code.
Possible error codes are listed in the table below:
Exit Code |
Meaning |
|---|---|
101 |
Error in loading DLL dependencies of installer plugins. |
102 |
Error in retrieving product key. |
103 |
Error in license manager service connection. |
104 |
Product key has a bad format. |
105 |
Error in license manager service logout. |
106 |
Product key does not exist. |
107 |
Error in accessing Windows Registry for Product Key. |
108 |
Error in accessing Windows Registry for admins. |
109 |
Error in encrypting settings files. |
110 |
Error in selecting an installation for all users without entering a Factory Enterprise product key. |
Edit the Ubuntu environment file, located at the path
/etc/environmentand add the following rows:export RULEX_ALLUSERS=0/1(choose 0 if you want the installation to be ‘only for me’ or 1 if you want to install it for all users)export RULEX_PRODUCT_KEY=your_product_keyexport RULEX_CONFIGURATION_FILE=SKIP/PATH_TO_FILE(type ‘SKIP’ if no configuration file will be specified)export RULEX_USERNAME=your_username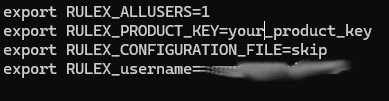
Start the installation by typing
sudo dpkg -i installer_name.deb
Cloud version#
Rulex Platform Cloud deployment is completely automated using the modern HELM technology which permits to script all the delivery procedure.
The following items are needed before installing the cloud version of Rulex Platform:
Helm Chart which acts as a package manager to manage and deploy applications in a cluster.
Product Key
First User Access, if Rulex Authentication Server is deployed.
Note
These items will be provided by the Rulex Sales team before installation.
The following prerequisites are the minimum parameters required to deploy Rulex Platform cloud:
Prerequisites
Area |
Minimum values (if applicable) / notes |
|---|---|
Orchestrator services |
Kubernetes (1.25.x or higher) or OpenShift (4.12.x or higher). |
Cluster |
The cluster must be sized according to the established usage, the minimum required is 4 nodes, each one with 8 vCPU, 32 GB Ram. |
Ingress Controller |
HTTP 2 must be enabled. |
TLS Certificate |
|
DNS |
The DNS must be configured to connect to the cluster. |
NFS Filesystem |
The system must belong to a Storage Class Read-Write Many, with 1800 IOPS and a size of 2TB. |
RabbitMQ operator |
RabbitMQ will be used as an internal broker. |
Docker registry |
This docker registry must be mirrored with Rulex Docker Registry to download base images of Rulex Platform microservices. |
Helm |
Helm must be installed in the same environment as the Kubernetes CLI (or OpenShift CLI in the case of an OpenShift Orchestrator). |
Network Connectivity |
The client must have access to the Rulex License Manager: |
The following requirements are optional, depending on customer’s needs:
Database PostgreSQL, if Rulex Authentication Server is present. The following are recommended:
Azure Database for PostgreSQL,
Amazon RDS for PostgreSQL,
BigAnimal,
Cloud SQL for PostgreSQL,
Crunchy Bridge,
Crunchy PostgreSQL for Kubernetes,
EnterpriseDB.
Keda, to enable Rulex Platform autoscaling.
Service Mesh operator, to further encrypt AMQPS calls and convert them into standard HTTPS calls (Istio Service Mesh is recommended).
To deploy Rulex Platform cloud, follow the steps below:
Procedure
Define the required parameters in the YAML settings file, whose values will then be used in the PowerShell command in Step 2.
The following are the most important arguments to set:
Argument
Name
Description
Type
Name
platform.hostname
Domain name assigned to the cluster.
string
Authentication Server
msAuth.enable
If true, the authentication server will be installed.
bool
Authentication Server Username
msAuth.adminUsername
Authentication server admin username.
string
Authentication Server Password
msAuth.adminPassword
Authentication server admin password.
string
Persistent volume configurations
persistentVolume.enable
If true, a persistent volume and the secret with the StorageAccount credentials are created.
bool
Persistent volume Storage class
persistentVolumeClaim.storageClassName
Name of the storage class.
string
Persistent volume Storage definition
persistentVolume.storageDefinition
Storage account driver and configuration.
yaml
Persistent volume Storage account secret
persistentVolume.storageAccountSecret
Storage account authentication secret.
yaml
Tip
The complete list of mandatory and optional parameters is available in the dedicated page: Cloud Settings (YAML).
Optional values have default values, which are used if such parameters are not specified in the YAML file. It is possible to find more information about the YAML format at the following link: https://yaml.org/.
An example of value settings in a YAML configuration file is described below.
platform:
   hostname: <to_fill>
msAuth:
   enable: true
   adminUsername: <username>
   adminPassword: <password>
persistentVolumeClaim:
   enable: true
   storageClassName: <to_fill>
persistentVolume:
   enable: true
   storageDefinition: {}
   storageAccountSecret: {}
Launch the following PowerShell commands:
$values_settings = "<file that contains all helm settings>"

# Deploy Rulex Platform
helm install platform $helm_registry/platform --values $values_settings

# installation of the infrastructure
helm install infrastructure $helm_registry/infrastructure --values $values_settings
Finalize the deployment during your first access
After the deployment has been completed, log in into Rulex Platform using the URL
<hostname>/web(e.g. test.rulex.cloud/web).Warning
The above-mentioned steps cover the standard scenario where the Rulex Authentication Server has been deployed.